
Myth Bust: Pretty Goth Has To Be Scary
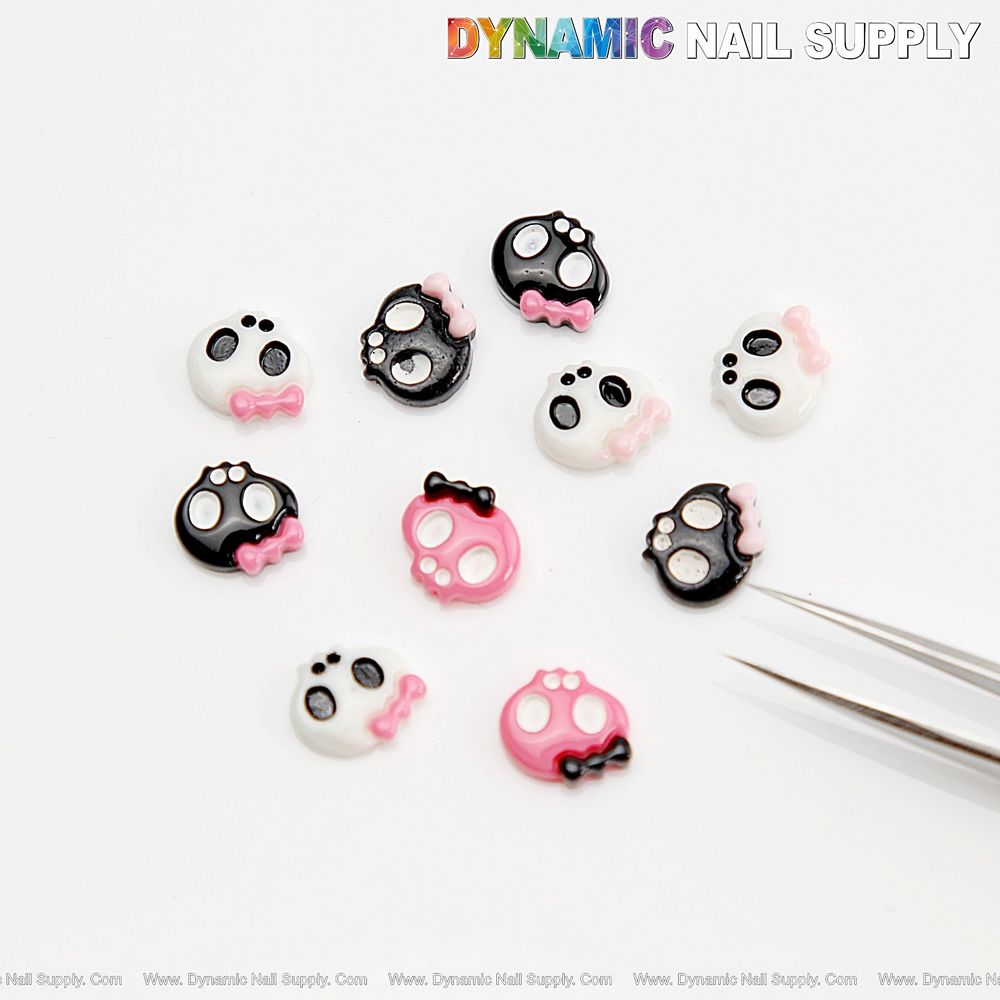
Many artists assume gothic nails must be harsh and moody. Imagine instead a pastel-goth glossy black French topped with small, bowed skulls that read cute not cruel—this is exactly what the 10pcs Resin White Black Pink Cute Bow Skull Charm Seasonal set is built for.
We’ll walk through a full gel workflow so you leave with a durable accent nail that preserves the raised enamel look of these tiny 3D skulls. You can find 10pcs bow skull charm set in our stash for quick add-on work; price listed at $3.99 may change.
Prep: Start Clean
Imagine a client who wants glossy black French nails with one pastel skull accent per hand. Start by sanitizing and filing the natural nail, pushing cuticles back gently and buffing the free edge only. Dehydrate the nail plate with a non-oily cleanser—no lotions immediately before service.
Shape the nail to the French you plan to paint: a short square makes the accent skull read larger; a longer almond stretches the French smile. Lightly dust off and apply a thin, even acid-free or acid primer according to your product system.
Base: Build a Glossy Black Canvas
For a true pastel-goth contrast you need a deep, glossy jet-black gel base. Apply one thin, even layer of a black base gel and cure per the manufacturer’s time (typically 30–60 seconds in LED). Follow with a slightly thicker second coat to ensure full opacity and cure again.
If you prefer a glossy matte contrast later, you can use a matte topcoat on surrounding nails but leave the accent nail glossy. For this walkthrough keep the accent nail glossy from the start so the skull sits on a shiny surface.
French: Paint the Glossy Smile
On the accent nail paint a classic glossy black French with a crisp smile line: use a detail brush and a steady hand to create the arc, or use a thin striping tape as a guide. Cure the smile line per product specs.
To make the skull pop, leave a small glossy crescent of white or bright highlight space at the cuticle area before attaching the charm. Cure that area to create a stable base for placement.
Placement: Adding the Pink Skull Accent
Now imagine placing a tiny 3D skull charm that’s glossy white, jet black, and baby pink with a delicate bow. These charms are small and shown in the product photo next to tweezers for scale, so plan placement on the accent nail where the raised resin won’t catch on fabric.
- Use precision tweezers to pick up a single skull charm—the shiny, raised enamel surface grips the tool without sliding.
- Apply a small dot of medium-viscosity gel adhesive or builder gel where you want the skull to sit. You want enough gel to level under the charm but not so much that it oozes beyond the base.
- Place the skull gently, bow facing up, and press lightly to seat it. If you need the skull to angle slightly for stylistic effect, adjust quickly—don’t over-manipulate once gel begins to set.
- Cure with LED for the adhesive’s recommended time. If you used a builder gel for adhesion, ensure a full cure so the 3D resin won’t move during topcoating.
Secure: Encapsulate Strategically
Because these skulls are raised 3D resin charms you do not want to fully encapsulate them under a thick gel layer—the whole point is the glossy enamel relief. Instead, apply a thin bead of clear builder or thick top gel around the base of the skull, not over the bow or raised forehead.
Use a small brush to gently feather the gel into the gap between charm and nail, creating a smooth junction that locks the charm down without flattening its high-gloss surface. Cure according to product directions.
Topcoat Choices: Preserve The Raised Look
Choose a no-wipe glossy topcoat for the surrounding nail areas to maintain shine. On the skull itself avoid flooding with topcoat; instead, spot-seal the base junction only. That preserves the distinct glossy white, black and pink surfaces and keeps the small bow detail crisp.
If you want contrast, apply a matte topcoat to the other nails and leave the accent glossy. This makes the pink bow and white skull leap visually from a matte black field.
Finishing Touches: Small Details That Last
Add tiny rhinestones or microbeads around the skull base if you want gemstone sparkle. Use a single tiny clear rhinestone at the bow knot for an extra feminine touch. Always secure those with the same thin bead of builder gel and cure fully.
Wipe the nail with alcohol only if your topcoat requires it; otherwise avoid oils near the charm for 24 hours so adhesives finish their bond strength.
Best For:
- Artists building a pastel-goth accent with glossy contrast
- Clients who want cute seasonal Halloween details without being spooky
- Mixed-media sets that use matte and gloss interplay
Not Ideal For:
- Clients who need snag-free nails for rigorous manual work
- Nail beds with very short free edges that can’t support raised charms
- Designs requiring full encapsulation over charms
Care & Safety Reminder
Advise clients to avoid prolonged friction against fabric for 24–48 hours after service and to be gentle when using cuticle oil near the charm junction. Handle small 3D resin pieces with clean, dry tweezers to prevent lifting. Dispose of any unused gel wipe solvents per local rules and keep tools sanitized between clients.
