
Myth Bust: Tweezers Are Just One-Size-Fits-All
Many techs think any tweezer will do for tiny decals and micro-studs. In reality, the shape, finish, and tip alignment change everything. Picture the [KB-002] Gold Easy to Use slant pointed curved tip precision tweezers: a warm pale gold, mirror-like tool built for fine placement. In this walkthrough you’ll see exactly how that design improves control when you apply nail decals tweezers to tiny pieces.
Scenario: A Delicate Bridal Set
Imagine a client asking for a soft-white bridal set with scattered gold micro-studs and ultra-fine foil lines. The enhancements are already cured and top-coated; now you must pick up and set dozens of 1–2 mm embellishments without smudging gloss or lifting edges.
Prep: Start Clean
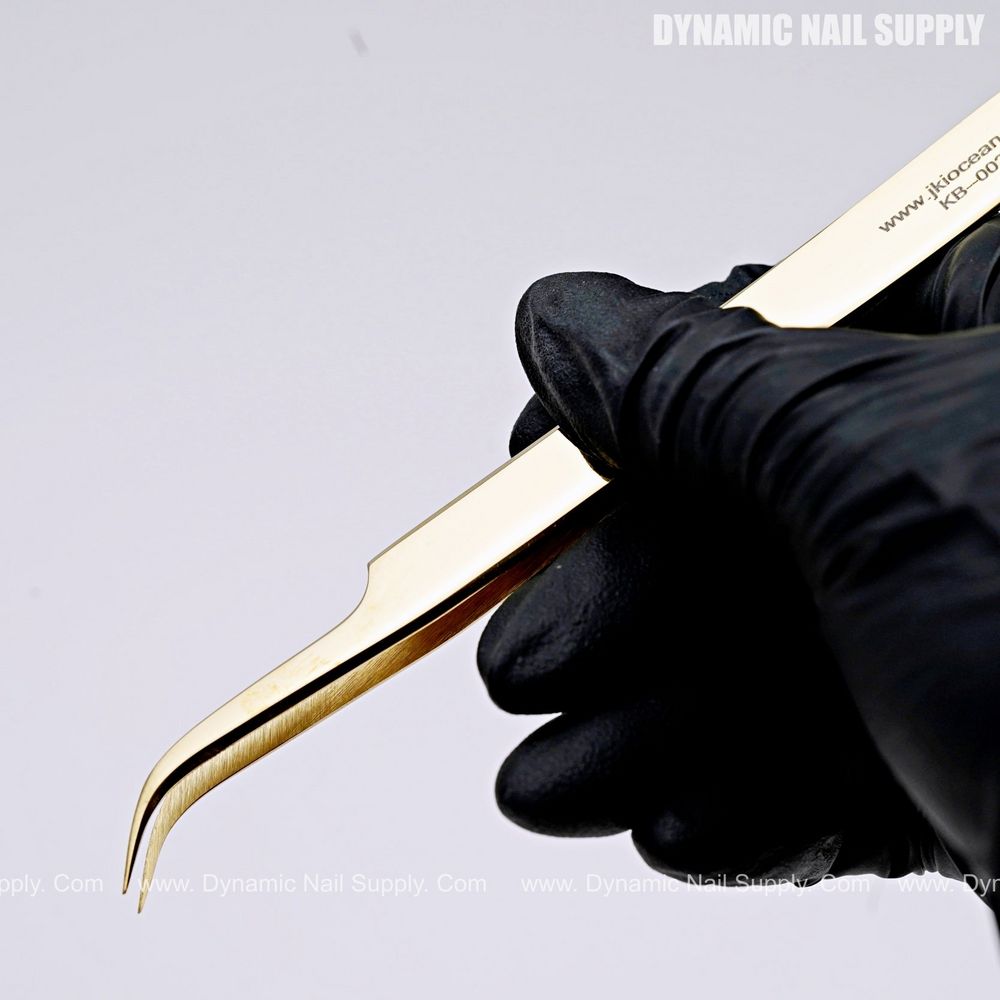
Start by keeping the work area minimal and bright. Lay a soft white lint-free cloth to match the clinical look that suits the warm gold finish of the tweezers; a clear tray prevents tiny pieces from disappearing into corners. Check the tweezers visually — the close-up engraved text along the flat handle edge in the photo confirms a hand-finished feel and alignment. If you wear gloves, choose thin nitrile so you can still feel the tension.
Pick: Isolate the Piece
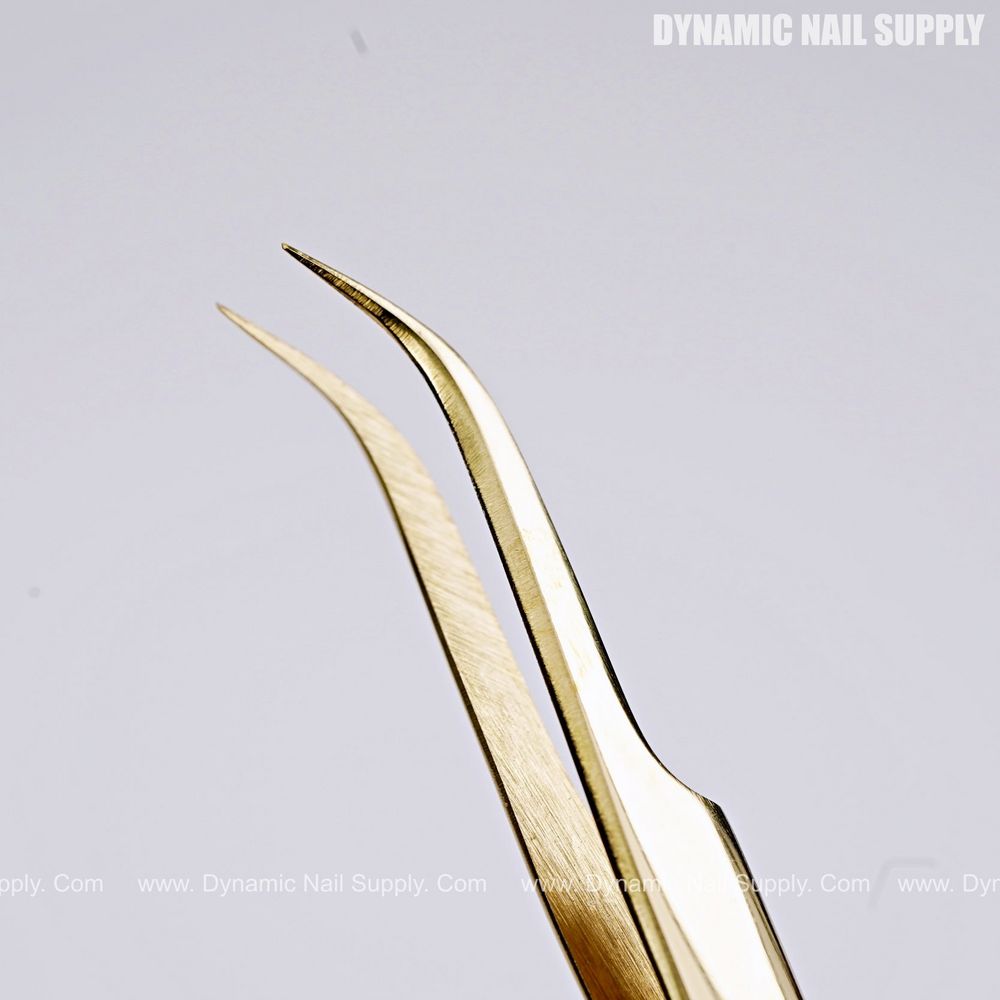
Use the curved slant pointed tips to approach the decal at a slight angle rather than head-on. The curvature lets the tips scoop under flat foil slivers or micro-studs without scraping the top layer. Lightly touch the item with just the tips — the excellent tension control of the tool keeps pressure predictable, so you don’t clamp hard and deform metal studs.
Place: Gentle Precision
Bring the picked piece to the nail in a steady hand position. The slant gives a natural line of sight, so you can see the placement without forcing your wrist into awkward angles. Use a minimal adhesive dot or slightly tacky top coat as your landing surface. With the shaped tips, you can hover the piece into position, then release by easing tension — the hand-finished tips close cleanly and let go without jerking the decoration.
Example Workflow: One Nail Start-to-Finish
- Prep the nail surface with a tacky layer or a small adhesive drop.
- Pick up the micro-stud using the curved slant tip, approaching from the free edge side so the curve cradles the piece.
- Hover the stud over the desired spot while checking alignment from a comfortable angle; the warm pale gold finish reduces glare and gives a clear visual cue against neutral bases.
- Set the stud gently, then tap the nail edge with the tweezer handle if needed to seat it.
- Cure if using gel adhesive, then finish with a thin top coat or edge-seal to lock the piece in place.
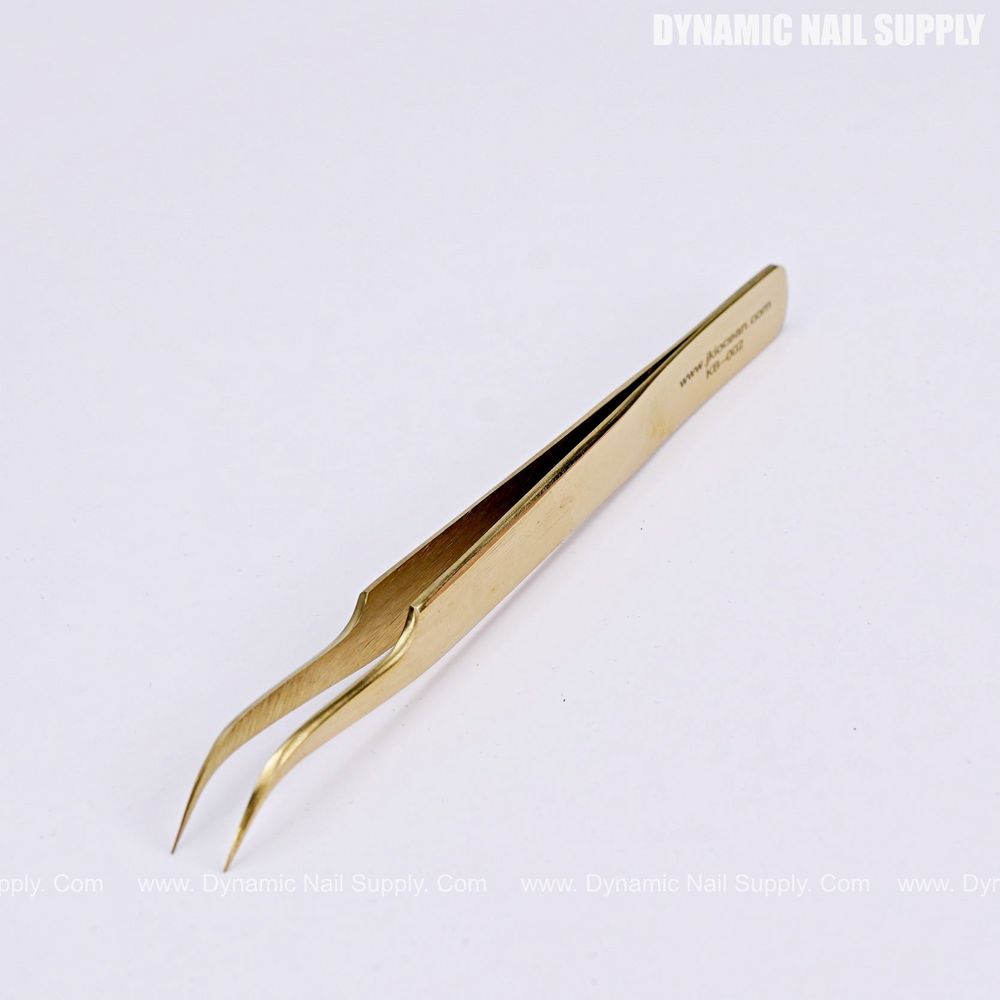
The gold plated mirror-like surface of the [KB-002] tool makes it easy to spot tiny reflections on the stud, helping you orient pinches and foil lines precisely. The protective tip cover included with the tool protects the points during storage and prevents accidental snags between appointments.
Practice Drill: Ten-Second Placement
Set a timer and practice placing ten micro-studs on a practice tip board. Speed improves once your eye and the curved slant tips sync. The textured, ergonomic handle gives stability through quick repetitions so you don’t sacrifice accuracy for speed.
Many pros like that these tweezers cost about $4.99, so you can keep a dedicated pair for delicate decals without worry — prices may change.
One helpful reference is how you would use KB-002 Gold Slant Tweezers when switching from flat to curved embellishments; that real-world choice shows why the slant pointed tip matters during tricky placements.
Best For
- Picking and placing micro-studs, gems, and tiny foil pieces.
- Working on neutral, bridal, or minimal white manicures that benefit from a gold accent tool.
- Technicians who need consistent tip alignment and predictable tension.
Not Ideal For
- Very heavy hardware or thick metal charms that require broad gripping surfaces.
- Tasks needing blunt, flat pressure over a wide area (use flat-tip tools instead).
- Situations where anti-reflective grey steel is preferred purely for optics (this is warm gold plated).
Care And Handling
After each session wipe the tweezers with a soft, lint-free cloth to remove adhesive residue; avoid abrasive cleaners that could dull the mirror-like finish. Store the piece with its protective tip cover to keep the delicate points aligned. If alignment ever feels off, avoid bending the tips; replacement is better than forcing a misaligned tip, especially with fine curved points.
Final Safety Reminder
These are pointed precision tools—handle them with care around eyes and skin, especially when working with lash or near-lash placement on nails near fingertips. Keep away from children and dispose of or replace the tool if tips become damaged. With simple care and mindful handling you’ll get consistent accuracy and long service from the warm gold curved slant design.
