
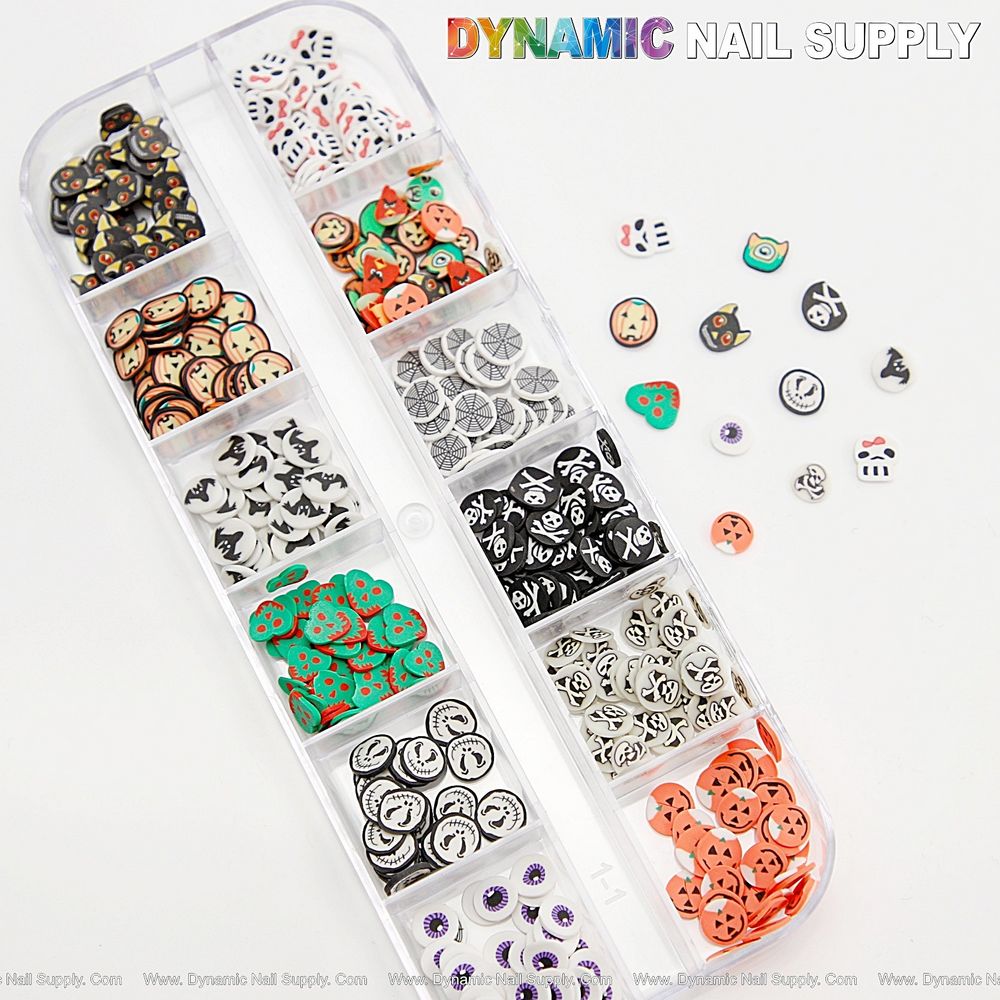
Seasonal nail accents can turn a simple manicure into a showpiece. These tiny polymer clay charms—mini ghosts, pumpkins and bats—are an easy way to add dimension and Halloween spirit to both natural nails and extensions.
What these clay nail charms are and why they work
Polymer clay nail charms are small, shaped embellishments made from baked clay. They come in a mix of Halloween motifs and bright colors that read well on camera and in person. Because they sit above the nail surface, they offer instant texture and focal points for themed sets without needing intricate hand-painting.
Tools and prep for salon-quality application
Preparing the nail and selecting the right adhesives are the most important steps. Typical supplies you’ll need include:
- Base coat and cure lamp (if using gel)
- Builder gel, nail glue, or clear acrylic depending on your system
- Fine-tipped tweezers or a wax picker for precise placement
- Top coat for sealing, plus optional no-wipe gel topcoat for glossy finish
- Cuticle oil and lint-free wipes for clean finishing
Keep a jar of Halloween nail charms in your essentials for quick Halloween looks.
Step-by-step: salon technique adapted for home
Follow these steps whether you’re a professional tech or doing nails at home. The sequence helps the charm stay secure and look integrated with the manicure.
- Prep the natural nail or tip. Push back cuticles, remove surface shine lightly, and apply thin base coat or primer as appropriate for your system.
- Place a small bead of adhesive. For gel systems, use a small drop of builder gel where the charm will sit. For non-gel, a drop of strong nail glue works.
- Pick and position the charm. Use tweezers or a wax picker to place the clay piece. Press gently but hold for a few seconds until initial set.
- Secure and cure. If using gel, cure according to product instructions. If using glue, let it set fully before continuing.
- Seal the edges. Add a thin line of topcoat or clear gel around the edges of each charm to lock it down and reduce snagging.
- Finish and hydrate. Apply final topcoat across the whole nail, then finish with cuticle oil.
Placement ideas for professional-looking sets
Charm placement changes the vibe of the set—use these layout ideas to create balance and visual interest.
- Accent nail focal point: Place a pumpkin or large motif on the ring finger and keep other nails simple.
- Mini clusters: Group two or three tiny pieces near the cuticle for a curated, editorial look.
- Tip border: Line small ghosts or bats along the tip for a playful French twist.
- Negative space contrast: Anchor a charm against a bare or softly tinted base to let the shape pop.
Key features to note when buying and using
These mixed clay sprinkles are sold as a variety pack of Halloween motifs designed for nail art. They work well with gels, acrylic overlays and glue-on systems. Because they are three-dimensional, plan your finishing technique so the charm edges are sealed and do not catch on fabrics.
Who should use these charms
This product is a smart pick for nail technicians building a seasonal portfolio, content creators shooting holiday looks, and manicure enthusiasts who want dramatic results without mastering sculpting. They are small, versatile accents that complement gothic, Y2K, punk and vintage-inspired sets—all styles referenced in common charm collections.
Care, wear expectations and safety notes
Because these are raised decorations, they are more exposed to daily wear. Seal the perimeter with topcoat and advise clients to be mindful when handling rough tasks. Avoid getting adhesives or uncured gels on skin during application and follow standard curing and ventilation practices. If a charm loosens, reattach it using a small drop of glue or overlay with builder gel.
Practical tips to elevate your results
- Use a tiny dab of clear gel to reposition before curing—gel stays flexible briefly so you can fine-tune placement.
- For longevity, embed charms slightly into a thin layer of builder gel before curing; this offers extra mechanical hold.
- Coordinate charm sizes with nail length—larger motifs suit longer tips, while micro charms work best on short nails.
- For social media, shoot against contrasting backgrounds to highlight the miniature shapes and colors.
These mixed Halloween-themed clay pieces are sold affordably—current listings show a typical retail price around $5.99—making them an easy seasonal add-on for both salons and personal kits. For sourcing, Dynamic Nail Supply carries seasonal charm packs and related accessories.
With a little practice and the right adhesive technique, these polymer clay charms let you deliver striking, professional-looking Halloween manicures at home or in the salon. Small touches make big statements—use them strategically and seal them well for lasting impact.
